Cost Implications of a Residential Rewiring Project in South Florida
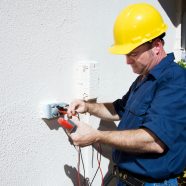
Older homes, like many in the south Florida area, often need a complete residential rewiring to keep them safe and up to code. If your home is more than 50 years old, it’s time to consider contacting a professional electrical contractor to inspect the condition of your home’s wiring. Even if age isn’t a consideration yet, there are other signs that indicate you need to have your wiring inspected. Look for:
- A faint burning smell or sizzling sound, especially when appliances are turned on
- Circuit breakers that trip or fuses that blow on a frequent basis
- Brown discoloration on switches and outlets and the walls around them
Residential rewiring isn’t a minor job, and the cost depends on many variables. It’s a serious renovation job, but in many instances there are ways to minimize the costs.
The Home Rewiring Process
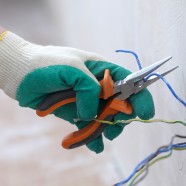
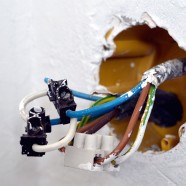
Rewiring your home involves removing all the old wiring and replacing it with newer, non-metallic wire. This new wire doesn’t get hot when surrounded with insulation, it’s easier to work with and it’s safer inside your walls.
In the most elaborate wiring jobs, electrical contractors remove the interior walls, replace all the wiring and rebuild the walls with the new wiring inside. This can take a lot of time and can be the most expensive method, as well as doing damage to older, historically significant buildings.
Contractors can replace the wiring using a series of small holes cut into the walls, along with a thin line called fish tape that draws the wire from one small hole to another. This method requires patching holes, but it keeps the integrity of older plaster walls while installing newer, safer wiring. Running wires behind existing walls can be much less expensive than replacing the walls themselves, and can save homeowners thousands of dollars in construction costs.
Residential Rewiring Costs
The price of each part of the job will vary from season to season, but it’s important to remember that many details go into the final cost. It’s not the price of the job itself as much as it is that of each individual part of the job.
Building permits are often the first item you’ll spend money on when having wiring redone. The permits will cost the same whether you or your electrical contractor pulls the permits, but your professional knows which ones you need and won’t waste money on those you don’t.
If you’ve got an older house that still has a fuse box, it will need to have a new circuit breaker installed. This can cost up to $3000, depending on the size of your home’s electrical demand load.
While you can save a bit of money reusing your old switches and outlets, you’ll still have to pay for your contractor to install them. A residential electrical south Florida contractor will charge around $100 per outlet for installation.
The most expensive materials cost is, of course, for the wiring itself. New wire can cost thousands of dollars, even for the smallest home, but it can pay off in peace of mind.
The most important item on your home rewiring job is the cost of a professional electrical contractor. Rewiring your home is never a DIY job; it takes a knowledgeable professional to safely install an electrical system that will last for decades.
Read MoreHow to Run New Wires Through Your Home’s Old Walls
If you’re buying an older house, or your family has grown since you bought your existing home, remodeling and renovation are probably on your mind. Bathroom and kitchen remodeling are the most popular renovation jobs in the country, but you’ll have to think about residential wiring no matter what room you want to work on. Electrical remodeling can be as simple as adding an outlet or as complex as creating an entirely new circuit for part of a room. While elaborate jobs should always be left up to professional electricians, you can do some simple tasks if you’re confident with basic tools.
Preparing for the Job
Doing your own electrical remodeling is only possible if you’re fanatical about the safety rules. If you never cut any corners you’ll be able to do some simple jobs, but if you’re the type to take shortcuts, then rather leave the job to the professionals.
If you do want to proceed with the project, begin by turning off the power to the room at the breaker box. If it’s too dim in the room, use bright flashlights to see your work. Use a voltage tester to make sure the outlet you’ll be working on doesn’t have any power going to it. Once you’re sure there is no power running to the outlet, remove any objects hanging on the walls in that area, such as televisions or paintings. Use a stud finder to locate the studs in the wall, and mark them with a pencil.
Making the Cuts
The phrase “measure twice and cut once” may never be more important as it is in reference to making holes in your wall. Be very strategic in the placement of the holes so that you don’t make larger ones than necessary.
Measure and draw outlines with a pencil for all the drywall holes you need to make. Cut a hole across all studs for easier access to the area you’ll be working in. Use a drywall saw to make clean cuts, and set each square aside after you remove it. You’ll be replacing these squares when the electrical work is finished. If you’ll be traveling the wire for the length of the wall, cut an interim hole to help you to guide it to its final destination.
Use a right-angle saw with a round bit to cut holes through the studs for the wires to go through. You can rent these specialty saws through some hardware stores and most home improvement centers. If you’ll be running multiple cables through the wall, such as for a wall-mounted television, drill a separate, larger hole for holding conduit.
Running the Wires
Begin at the highest point and run the wires down through the inside of the wall. Gravity will help the wire to go where you want it to, but if you have any problems sending the wire to the right place, use fish tape to guide it. Fish tape, otherwise known as an electrician’s snake, is a long coil of wire designed to help pull wires through long expenses of wire. It’s coiled up but stiff, much like a metal measuring tape.
Feed the end of the tape through one hole in the wall and feed it toward the other end. Once you see the end of the fish tape, attach it to the wire and coil the tape back up. The wire will follow along, emerging exactly where you need it. From there, you can proceed with installing your outlet.
Professional Help
Some small jobs covering small areas of the wall can be done by amateurs, but if you’re considering a large electrical remodeling job, allow a licensed electrician to do the job. They know exactly how to move wires through walls, the optimal spot for all new outlets, and the safest way to finish the job. Doing elaborate wiring work on your home is no job for a beginner. Electrical fires take out thousands of homes each year, and many of them could be avoided by using better electrical safety methods. Call a professional for anything but the simplest job, and even then if you’re not certain of every step to take to complete a safe and neat job.
Read More5 Tips for Installing a New Power Outlet in Your Home
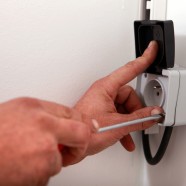
As your family grows, along with your collection of electronic gear, your need for power will increase every year. You might rely on extension cords or power strips temporarily, but these can be a fire hazard if used for more than just a short time. One of the best methods of electrical protection is to increase the number of outlets in each room. Once you’ve filled up all the outlets and still have a need to plug in more items, it’s time to add a new power outlet in your home.
Read MoreReasons to Replace Older Electrical Wiring in Your Home
As long as the lights are shining and the air conditioning is working, most people don’t give the wiring in their home a second thought. Unless you’re the original owner of your house, you’ve got no way of knowing everything you should about the electrical system in your home. Electricians tend to replace what’s needed and worn out, leaving the rest behind in a piecemeal fashion. The result is usually a mixture of old and new wiring with varying abilities to run the appliances you have in your rooms. Replacing the older electrical wiring might be an obvious choice once you start having problems, but there are reasons to renew your system before you start to see troubles.
Room Renovation
When you’re redoing a room in your home, it’s the perfect time for an electrical renovation. Contractors will be knocking down interior walls and making over the interior of your home, why not improve the workings inside as well? It’s the easiest time to replace electrical wiring, since your contractor won’t have any wallboard in the way, and it’s much simpler to find out the condition of the wiring that’s already installed.
Fire Hazards
Worn electrical wiring is one of the most common causes of house fires. If the electrical wiring in your home is cracking, fraying, or falling apart in some other way, the exposed wires cause a real danger of sparking and catching home materials on fire. Here are some of the most common warning signs:
- Frayed wires with the covering cracked or broken and the interior wiring exposed
- Outlet scorch marks. Outlet covers should be cool to the touch. Warm or hot spots usually mean a short in the wire behind the outlet plate.
- Dimming lights when you plug in the vacuum or use the microwave
- Rodent problems. If you’ve had trouble with mice or rats, take the time to inspect your wiring. Rodents love to chew on the coverings of residential electrical wiring
- Circuit breakers tripping. Once is an annoyance. Multiple times means your wiring isn’t up to handling the load you’re asking it to carry
Economics
If you’re going to have your wiring replaced, doing it during a home renovation is the least expensive time frame in which to do it. You won’t have to pay for any demolition needed to get to the wires, and wall repairs have already been budgeted. Upgrading your wiring to a more modern system can save you money in other ways, too. Upgraded systems with the correct amount of outlets can handle home usage easier and will send fewer surges through the system. This can save you thousands of dollars in computer costs if you don’t have an upgraded surge protector installed.
Modern Usage
Think about the electrical appliances you use every day compared to even 10 or 20 years ago. Today’s family typically has at least one computer that runs almost all day as well as HDTVs, elaborate stereo systems, smart appliances, and other belongings that use electricity in increasing amounts. Older wiring was never made to handle these loads, and will short out if asked to cover these loads for any period of time. Upgraded circuit breakers will handle overloads and surges, which additional lines and dedicated systems provide extra computing power for families with multiple work stations for work and school research.
Read More5 Wiring Problems You Can Solve During a Home Renovation
Some electrical wiring problems aren’t dangerous, so they’re not worth tearing apart a room just to upgrade your system. They can be annoying, though, and they’re the perfect candidates for extra projects during a home renovation. Whether your electrical wiring is from your grandmother’s time, or it just got installed the last decade, it can be outmoded and ready for replacement if it’s causing problems. Work with your electrical contractor when planning your home rewiring job to include extra wiring problems you may have.
Lights Flickering When It’s Windy Outside
Unlike some of the annoying circumstances you can fix during a home rewiring bout, this one can actually be dangerous and should be taken care of as soon as possible. The spot where the power lines connect with your house is attached to a fixture. When the wind blows the line around and it rubs on the fixture, parts of the line can fray and cause small breaks in service. These small breaks can cause sparking and a fire hazard, especially during rain storms which is typically when high winds occur. Speak with your utility company. They’ll probably replace your fixture for free, although a home renovation is a good time to do this as you can coordinate your décor with the electrical work.
Too Few Outlets
If your family has grown, your need for electrical power has probably grown even quicker. A home renovation is the perfect time to add more electrical wiring for more outlets in each wall. Families have varied needs for extra outlets, such as:
- A home office with extra computers and printers
- Teenager’s rooms with televisions and stereos
- Outdoor kitchens on decks or patios
- Kitchens with lots of new small appliances
If you’re relying on multiple power strips and extension cords for your everyday life, it’s time to get an upgrade. Your electrical contractor can easily include extra outlets in your renovation plan, solving the problem of having to unplug some appliances before plugging in others.
No GFCIs Installed
GFCIs, or Ground Fault Circuit Interrupters, are designed to immediately turn the electricity off if the plugged-in item comes in contact with water or other types of moisture. These safety features are standard in bathrooms and kitchens, but if you’ve got an older home they may be missing from your rooms. It’s a very simple task for your electrician to switch out one type of outlet for another during a home rewiring job, but it’s crucial for your family’s safety, and may even be required for a renovation, depending on your particular city’s building codes.
Plugs Fall Out of Outlets
You plug in a lamp, and an hour later the plug is laying on the floor. No, you don’t have poltergeists; you just have an older electrical system in your house. Outlets should grip the end of the plug when it’s inserted into the holes. When the clip that’s designed to hold the plug wears out, it allows the plug to slip out and fall to the floor. Unfortunately, this situation can cause arcs, sparking, and a fire hazard. Have your contractor change these outlets as soon as possible.
Power Upgrade Needed
If you’re relying on fans to get through a Florida summer, your home probably needs a power upgrade. With the right type of wiring, adding an air conditioner can result in a surprising amount of energy savings in the long run, between the cold showers you avoid and the efficiency of today’s EnergyStar appliances. A home renovation is the perfect time to upgrade your circuit breaker and wiring, as well as installing new major
Read MoreHow to Prevent Problems from Overloaded Circuits
It’s not likely that your house will catch on fire from one tripped circuit breaker, but frequently overloaded electrical circuits can become a dangerous situation if they’re not corrected. Power surges are common in Florida because of the frequent electrical storms in the area, and any circuit that’s running up to capacity is in danger of overloading every time lightning strikes in the area. Preventing problems with your electrical equipment is a matter of preparing ahead of time, then keeping up with the quality of your equipment rather than letting it fall into disrepair.
Audit Your Equipment
If you’ve been tripping circuit breakers or if you have lights that dim when the refrigerator comes on, you know where the problems are in your house. Not having these problems doesn’t mean your electrical equipment is perfectly fine, though. Circuits may be running just on the edge of their limits, and one storm or an extra appliance being plugged in can be just enough to push them over the edge.
If you don’t have a circuit map of your home, take the time to create one of your own. Turn one breaker off, then move through the house and see what lights, outlets, and equipment doesn’t work. Mark that area on the map and indicate what breaker it’s connected to, then move on to another breaker. Map out your entire house in this manner.
Go through each individual circuit and unplug any appliances that aren’t currently in use. If you make coffee once a day, unplug the pot when you’re ready to head out in the morning. Work all day long? You don’t need the television plugged in, draining power while you’re gone. From phone chargers to blow dryers, most houses have dozens of items plugged in and draining power. Lighten the load on your circuits by unplugging yours.
Upgrade Your Electrical Installation
The equipment in your house uses electrical services in the most efficient way it can, but if you’re overloading the system, it’s probably time to upgrade and replace your older electrical equipment. The most obvious clue that you need an upgrade is having an older house with a fuse box instead of circuit breakers. Call an electrical contractor to replace this immediately, as older fuse boxes are almost invariably worn out, creating a fire hazard in your home.
If you’re constantly having to unplug appliances just to plug something else in, or if you’re relying on power strips and extension cords as a permanent solution, you need an upgrade on wiring and outlets. Adding outlets in logical places depending on your electrical usage can help to spread the load, but you may need additional upgraded wiring if your usage is heavy in one part of the house such as an office with multiple computers and large monitors. Your contractor will test your lines and tell you if you need an upgrade.
Schedule Regular Maintenance Appointments
Electrical maintenance isn’t just for repairing problems once they’ve happened. The best and least expensive way to deal with electrical problems is to prevent them before they happen. Scheduling regular maintenance appointments with an electrical contractor will eliminate most of the problems you have with wiring and circuits in your home. An electrical contractor will check wiring for wear and excess usage, look for possible improvements in your system, suggest ways to save power, and replace any equipment that’s beginning to wear out. You schedule regular dental and medical checkups for yourself; give your home the same consideration and have your electrical contractor check your wiring a couple times a year.
Read More

Recent Comments