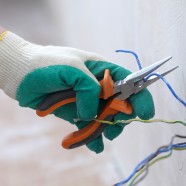
If you’re buying an older house, or your family has grown since you bought your existing home, remodeling and renovation are probably on your mind. Bathroom and kitchen remodeling are the most popular renovation jobs in the country, but you’ll have to think about residential wiring no matter what room you want to work on. Electrical remodeling can be as simple as adding an outlet or as complex as creating an entirely new circuit for part of a room. While elaborate jobs should always be left up to professional electricians, you can do some simple tasks if you’re confident with basic tools.
Preparing for the Job
Doing your own electrical remodeling is only possible if you’re fanatical about the safety rules. If you never cut any corners you’ll be able to do some simple jobs, but if you’re the type to take shortcuts, then rather leave the job to the professionals.
If you do want to proceed with the project, begin by turning off the power to the room at the breaker box. If it’s too dim in the room, use bright flashlights to see your work. Use a voltage tester to make sure the outlet you’ll be working on doesn’t have any power going to it. Once you’re sure there is no power running to the outlet, remove any objects hanging on the walls in that area, such as televisions or paintings. Use a stud finder to locate the studs in the wall, and mark them with a pencil.
Making the Cuts
The phrase “measure twice and cut once” may never be more important as it is in reference to making holes in your wall. Be very strategic in the placement of the holes so that you don’t make larger ones than necessary.
Measure and draw outlines with a pencil for all the drywall holes you need to make. Cut a hole across all studs for easier access to the area you’ll be working in. Use a drywall saw to make clean cuts, and set each square aside after you remove it. You’ll be replacing these squares when the electrical work is finished. If you’ll be traveling the wire for the length of the wall, cut an interim hole to help you to guide it to its final destination.
Use a right-angle saw with a round bit to cut holes through the studs for the wires to go through. You can rent these specialty saws through some hardware stores and most home improvement centers. If you’ll be running multiple cables through the wall, such as for a wall-mounted television, drill a separate, larger hole for holding conduit.
Running the Wires
Begin at the highest point and run the wires down through the inside of the wall. Gravity will help the wire to go where you want it to, but if you have any problems sending the wire to the right place, use fish tape to guide it. Fish tape, otherwise known as an electrician’s snake, is a long coil of wire designed to help pull wires through long expenses of wire. It’s coiled up but stiff, much like a metal measuring tape.
Feed the end of the tape through one hole in the wall and feed it toward the other end. Once you see the end of the fish tape, attach it to the wire and coil the tape back up. The wire will follow along, emerging exactly where you need it. From there, you can proceed with installing your outlet.
Professional Help
Some small jobs covering small areas of the wall can be done by amateurs, but if you’re considering a large electrical remodeling job, allow a licensed electrician to do the job. They know exactly how to move wires through walls, the optimal spot for all new outlets, and the safest way to finish the job. Doing elaborate wiring work on your home is no job for a beginner. Electrical fires take out thousands of homes each year, and many of them could be avoided by using better electrical safety methods. Call a professional for anything but the simplest job, and even then if you’re not certain of every step to take to complete a safe and neat job.

Recent Comments