As your family grows, along with your collection of electronic gear, your need for power will increase every year. You might rely on extension cords or power strips temporarily, but these can be a fire hazard if used for more than just a short time. One of the best methods of electrical protection is to increase the number of outlets in each room. Once you’ve filled up all the outlets and still have a need to plug in more items, it’s time to add a new power outlet in your home.
Tip #1: Safety First
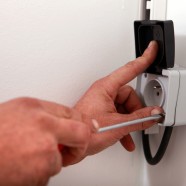
Every time you deal with wiring, it’s important that you be doubly careful to shut down all power sources near where you are working. The first step is to turn off the power at the circuit breaker. If you’re not sure which breaker controls the room in which you’re working, test with lamps until you find all the circuits that apply. Once you think all the power is off in the room, double-check with a voltage tester held near outlets around the room.
Tip #2: Moisture is the Enemy
When contemplating adding a new power outlet in rooms that include a water source, the only smart choice is an outlet that includes a GFCI, or Ground Fault Circuit Interrupter. Depending on where you live, regulations or laws may require you to install this type of outlet. With a GFCI, if something plugged into that outlet gets wet, such as a blow dryer falling into a sink full of water, the circuit will interrupt and electricity will no longer run through the wires. This method of electrical protection prevents dangerous and even fatal accidents in the kitchen, bathrooms, and laundry room.
Tip #3: The Circuit Breaker
In many cases, you’ll have to run a line to the circuit breaker, adding a new breaker to handle the new outlet and items you plug into it. This can be a relatively simple task for some types of breaker boxes, but others can be more of a challenge than the average homeowner will want to tackle. If your breaker is:
- Murray, it should be safe
- Bryant, it’s one of the easiest ones to work with
- Zinsco, look for a professional
- Stablock, you probably shouldn’t try it yourself
- Pushmatic, the way it’s wired you’re likely to short the whole system out by simply opening it
In any case, unless you’re absolutely sure you know what you’re doing, or you have expert help on hand, consider calling an electrician in south Florida before attempting a complicated wiring job.
Tip #4: Color Matters
The color of the wire coloring matters, as well as the color of the wire metal itself. Each one indicates the polarity of the electricity running through it. Always connect the white wire to the silver colored screw. This is the neutral wire. After that, connect the black wire, which is the hot wire, to the bronze colored screw. Finally, you’ll find a ground wire that is either covered in green or a bare copper wire. Connect this to the green grounding screw.
Tip #5: Be Smart When Saving Money
You may have the knowledge to save the cost of an electrician for adding simple outlet to your home, but don’t try to add to the savings by installing cheap outlets. These inexpensive outlets hold pinch points that allow you to shove a bare wire into them, pinching the wire to hold it in place. As you might think, they’re not a very stable way to keep a dangerous live wire where it should be. More reliable outlets have screw terminals that tightly hold wires in place. These outlets may cost a little more, but you’ll save a lot in peace of mind, not to mention the electrical protection you’ll get from wiring your home the correct way.
Recent Comments