How to Make Your Home a High Performance Electrical Superstar
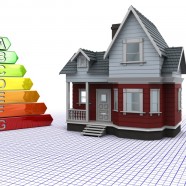
High performance homes are in big demand. People love to buy these types of homes, because they know that a certified high performance home will have the best heating and cooling efficiency, the best ventilation, and the best electrical efficiency. Many new homes are built to high performance standards from day one, but it is possible to retrofit too.
If you want to make your home a high performance superstar, there are a few steps you can take to make positive changes to your power consumption.
Get a RESNET Approved Contractor
The first step in transforming your home into a finely tuned electrical machine is to find a contractor who is RESNET approved. RESNET is the umbrella body that manages the HERS (Home Energy Rating System), and ensures that contractors who are performing HERS construction or upgrades are following best practices. There is a handy search function on their website, to help you find a contractor in your area.
Getting Your HERS Rating
Often, when working with an existing building, the first step in transforming your house into an energy efficient home is to get your HERS rating. This is a number, based on a variety of energy related factors, which indicates how energy efficient or otherwise your home is. It is a number that will either be above or below 100 (which is the benchmark for HERS ratings.)
If your home has a rating below 100, then that means it is more energy efficient than average, while ratings above 100 are less efficient.
Knowing where your home falls on the spectrum is important, so that your contractor can determine what changes need to be made to make your home as efficient as possible.
Improving Your HERS Rating
There are several things you can do in your existing home to make it more energy efficient, and to improve your HERS rating. Here are a few very simple changes that can make a big difference:
- Switch out appliances for energy efficient ones. If your appliances are older, chances are they are not as efficient as they could be, and you could save a considerable amount of energy by using newer, Energy Star rated ones instead.
- Upgrade lighting to be energy efficient. Switch out fixtures for LED or CFL friendly versions, and trade your regular garden lights for solar powered versions.
- Improve your insulation. Even though you probably do not need the heating benefits in Florida, you can cut your cooling bill considerably, including the power required to run your air conditioning units.
- Replace windows with energy efficient versions. These windows have an invisible film on them that prevent the entry of a percentage of solar rays into your home. Again, this can make your home cooler and save energy and money.
- Upgrade your water heater and fix dripping faucets. You may not think that plumbing upgrades would affect power consumption, but since heating water is a big chunk of your power bill, changes like this can improve your energy consumption and rating significantly.
There are many reasons to upgrade your home and improve its HERS rating. You can inspect and improve electrical protection at the same time, you will save power, and your home will be more energy efficient and less hard on the environment.
Read MoreBuying a New Home? Electrical Must-Haves to Keep in Mind

If you are a new homebuyer, particularly if you are going to be involved in the design and construction process, then you really do have an opportunity to get exactly what you want and build the home of your dreams.
While you may be excited by finishes and enchanted by fixtures, don’t forget to spend a little time considering the less visible, less sexy elements of your new home. Like the plumbing and electrical. You might not think about it as much as you do designer cabinets and glorious granite countertops, but you will be glad you took the time later on!
While we can’t give you any advice about plumbing or countertops, here is our list of important must haves for your new construction electrical:
- A bigger panel than you think you will need. At some point in your home’s lifespan, you or someone else will want to add on or expand something, and that will require a bigger panel. Do not go for the minimum. Build in some room to grow.
- Aim to have two outlets on each large expanse of wall, particularly those where you know you will be positioning electronics.
- Pre wired audio. Although not a must have, pre-wiring audio for a media room and to other rooms in your new house can save a lot of time and money later on, and will look much better than most after the fact home installs.
- A hard-wired smoke / carbon monoxide sensor system. These are great because you will never forget to change the batteries!
- A well thought out lighting design, including allowance for energy efficient lighting. Make sure that all of the fittings you choose for your lighting designs are compatible with the latest CFL and LED lightbulbs, since they are a big cost saver!
- A backup power supply, whether it is a generator, invertors or a solar or wind power system, it is always great to have an alternative source of power when there is a blackout.
- A garage door and or gate operator. They may not be absolutely essential, but they can make life a lot easier, and easy is never a bad thing!
- A smart home system. Tracking, managing and monitoring your home from afar is now easier than ever, and new smart home systems are surprisingly affordable.
- A home security system. Again, these are much cheaper these days, and cameras, intercoms and even locks are accessible from smart phone apps, depending on what type of system you choose.
- Outdoor electrical, including power for a pool filtration system, or the ability to add one later on.
You might not need all of those things in your new home, but if there are any that seem to be important, it’s worth talking to your electrical contractor sooner rather than later. It is always easier and cheaper to install electrical or make provision for future installation before construction is finished than to add them later.
Read MoreFall Home Upgrades for Cost-Conscious Homeowners

Fall in Florida is not really what you would experience elsewhere in the country. We are lucky that we have beach weather pretty much year round, and we are definitely not pining for fall leaves down here!
However, with hurricane season coming to an end, the calmer, slightly cooler days of a Floridian fall are also the perfect time to do some timely and cost saving home maintenance, and here are our top recommendations if you’re looking to do some home upgrades:
- Give your kitchen a facelift. Paint or stain cabinets a new color and add new hardware for an instant upgrade. Dated ceramic tile can also be updated with a coat of paint.
- Revive tired exterior wood with stains or sealing products. Decks in particular can take a beating in the Florida climate, and need regular application of protective products to keep looking their best.
- Blackout-proof your home. Add a home standby generator and make sure that the next time there is a big storm; your lights are the ones that stay on!
- If you don’t want to install a generator that can run your whole house right now, consider installing Uninterruptible Power Supplies (UPS’s) to safeguard sensitive equipment like computers and TVs. Not only can they give you time to power down safely when the power goes out, but they can also help to protect equipment from power spikes and surges.
- Switch out old incandescent lightbulbs for new CFLs or LEDs and get all the electrical cost savings that come along with that!
- Consider backup solar or wind power instead of a generator. Florida is the sunshine state. Might as well make the most of that! A solar water heater can also save you plenty of dollars over time!
- Refinish your floor. Wooden floors can become worn and damaged over time. If yours is looking tired, you can hire a floor sander and give it a new lease on life in a weekend!
- Add solar outdoor lighting for your yard, and get more use of the yard during fall and winter.
- Paint interiors and exteriors. Nothing refreshes your home as much as a lick of paint, and the slightly cooler fall weather is the perfect time to update the color palette of your home.
- Consider applying window film. You can buy window film for DIY application, and they offer savings on cooling and climate control as well as security features, which makes them a great, easy upgrade.
- Update your indoor spaces by investing in new throw rugs. Aside from paint, this is one of the cheapest, quickest and easiest upgrades you can do to any room in your home.
Whether you make home upgrades to save on power or to stay ahead of home maintenance, fall is the perfect time to do them, even in Florida. Once they are done, you can sit back with your feet up, and enjoy the sunshine.
Read MoreWhat Does it Cost to Upgrade an Electrical Panel?
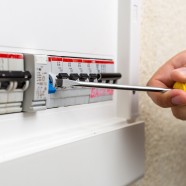
The electrical panel in your home or business is where the electricity to the building is controlled. Different panels are able to handle different amounts of electricity flowing through them, and older panels traditionally are rated for far less power than newer models. This type of electrical upgrade cost depends on a number of factors, from local labor costs to the state of your building’s wiring system. Compare the cost vs. the benefits to decide if an electrical upgrade is right for you.
Read More5 Tips for Cleaning Up After an Interior Fit-Up
An interior fit-up makes good business sense. Instead of doing every individual job piecemeal, getting it all done in one sweep will keep your business closed for the shortest amount of time and interrupt the fewest number of days for you and your employees. Even business owners facing new construction benefit from this business-building plan. If your fit-up included electrical installation, and most do, you’re probably left with a large mess to deal with before you can reopen your doors. It’s not just a matter of throwing out the trash. This mess needs special attention.
Disposing of the Dust
If you think dust is just an annoying film that coats your store shelves, you’ve never dealt with the aftermath of an electrical installation. This dust will coat every surface, and stays suspended in the air until you get rid of it. Begin by changing the air filters in your HVAC unit. This is the first line of defense against redeposited dust. Check the filter each day and change it again as soon as it’s needed. Walls are just as likely to harbor dust as floors or shelving. Moisten a towel and wrap it around a broom head, and use the broom to wipe dust from wide expanses of walls. Keep the towel just barely moist to avoid damaging any fresh paint that may have been added.
Livening up the Light Fixtures
The light fixtures are sure to be coated in dust and debris, even if they’ve been newly installed. Use a three-step ladder or other safe device to reach the top of each lighting fixture to remove the dirt. Any soil you knock free will fall onto the dirty room interior, so don’t worry about collecting this or using special tools.
Freeing the Floor of Debris
By this time, you’ve got a floor covered in dirt, dust, and broken materials. Work your way in from the outer edges, picking up the heaviest and bulkiest objects first. This is when the most danger lurks; broken glass, bare wires, and bent nails can be hiding among bits of wallboard or insulation. Use heavy work gloves when picking up discarded objects, or push them outside with a broom or shovel. Once the major pieces of garbage have been removed, sweep the floor. Do it once with a commercial push broom to get rid of the most obvious mess, then move on to a smaller broom or soft dry mop to pick up any remaining dust. Mop the floor, paying close attention to the corners, to finish the floor job.
Inspect Furniture and Appliances
Even if you’ve covered the furniture, a fit-up with electrical installation is such a major piece of work that dust and debris are likely to have worked their way into multiple odd places. Vacuum all the couches, side chairs, and desk chairs. Open all desk drawers and filing cabinets to make sure stray nails or debris haven’t fallen inside. Make a thorough search of the interior of any coffee makers, microwave ovens, or other small kitchen appliances you may have. While dust on the floor is annoying, dirt in your coffee maker can be physically dangerous.
Final Inspections
Once the interior of your business is clean, it’s a great idea to walk through and make sure all the electrical renovations work like you’d planned they would. Turn switches on and off, check every wall outlet with a lamp or other small appliance, inspect lighting fixtures or exit lights that may have been installed to make sure they are cleanly finished and work as expected. Turn on any large equipment such as air compressors or freezers to make sure the power is flowing to them and that they work.
Read MoreHow to Maintain Your Outdoor Landscape Lighting in Good Condition

Spot lighting and general area lighting are an attractive and important part of many landscape plans. Why put in elaborate trees and hedge designs if you can’t see them after dark? If you’ve decided to include landscape lighting in the plans for your property, set up an electrical maintenance schedule to keep your lights in good running order. Your residential electrical contractor can not only install all the outdoor light designs you want, he can tell you when your system needs maintenance during the year.
Visibility
Landscape lighting, by its nature, is set close to the ground and is vulnerable to damage from all landscaping machines such as lawnmowers and weed trimmers. Placing a set of green lights in the middle of the lawn might be a good design choice, but those lights aren’t likely to last long. They’ll fall victim to your lawnmower before the end of summer, most likely. Either choose a color that stands out from the lawn, such as black or a color to match your flowers, or put something around each light fixture that draws the eye. White wire fencing is inexpensive, light, and simple to install, yet you’ll see them from halfway across the yard. And lights that you see are less likely to be damaged.
Materials
The atmosphere in your environment makes a big difference when it comes to your ability to maintain landscape lighting. Some metal fixtures can corrode when installed in salt air, like the air that’s found in southeastern Florida. Although you may love the look of other metals, brass and copper are superior finishes for salt air. They may patina over time, but they’re meant to, and the change in color is a natural process that won’t affect your lights’ operating ability.
Dead Light
One of the simplest forms of electrical maintenance happens when a light bulb seems to blow out. Often, it’s not the bulb but the socket in which it’s placed. Unplug the lighting system to make sure no power is running through it, then take the top off the light. Replace the bulb with another one from the same string. If the bulb still won’t light, you probably have corrosion in the socket. Cut down an emery board until it’s small enough to fit into the slot where the bulb goes, and slide it up and down to file off any corrosion that may be built up on the contacts. When you replace the bulb and turn the power back on, the lights should work like normal.
Maintaining Lights
Your residential electrical contractor should come out twice a year for basic maintenance. He should change all the bulbs to prevent them from burning out at inopportune times. He’ll also spray a corrosion preventative compound to the base of the lamp to help prevent salt air and sprinkler moisture from corroding the light’s contacts. New corrosion preventative should be applied each time the lights are changed.
Electrical Outlet
One of the best ways to maintain your landscape lighting is to make sure it’s connected to a safe system. Since the outlet and plug for your lights will be outdoors in the elements and subject to rain, the plug should be connected to a GFCI outlet. If your home doesn’t have this available, have your electrical contractor install one at the same time the lights are installed, or as soon after as possible if you’re inheriting an older system.
Read More
Recent Comments